|
Nikkor AF-S DX 17-55mm f/2.8 G IF-ED - Review / Test Report - Analysis |
|
Lens Reviews -
Nikon / Nikkor (APS-C)
|
|
Page 2 of 3

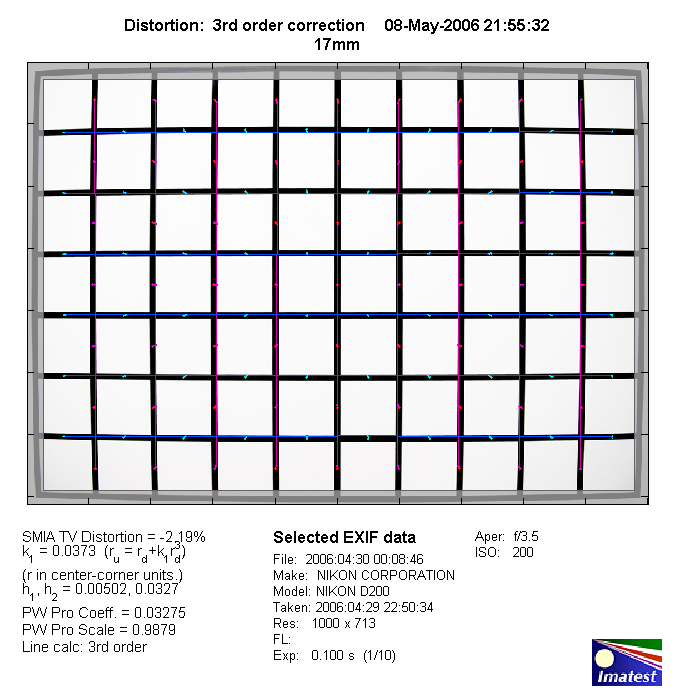
Distortion
The AF-S 17-55mm shows a quite typical distortion characteristic for a lens in this class. At 17mm there's rather pronounced barrel distortion changing to moderate pincushion distortion towards the long end of the zoom range. At 24mm both forces even out with virtually no distortion at this focal length.
|
Move the mouse cursor over the focal length text marks below to observe the respective distortion
|
| 17mm |
24mm |
35mm |
55mm |
|
|
The chart above has a real-world size of about 120x80cm.
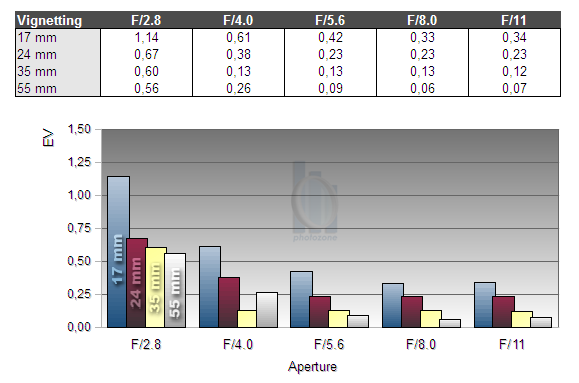
Vignetting
The AF-S 17-55mm DX is a reduced image circle lens (APS-C) and, as is typical for
such lenses, vignetting is somewhat more pronounced compared to full frame lenses.
As usual, the problem is most significant at 17mm @ f/2.8 where the
vignetting exceeds ~1.1EV at the image borders. The issue eases towards the
55mm end of the zoom range but vignetting remains relatively high here.
However, from f/4 upwards the issue is well under control for such a lens.
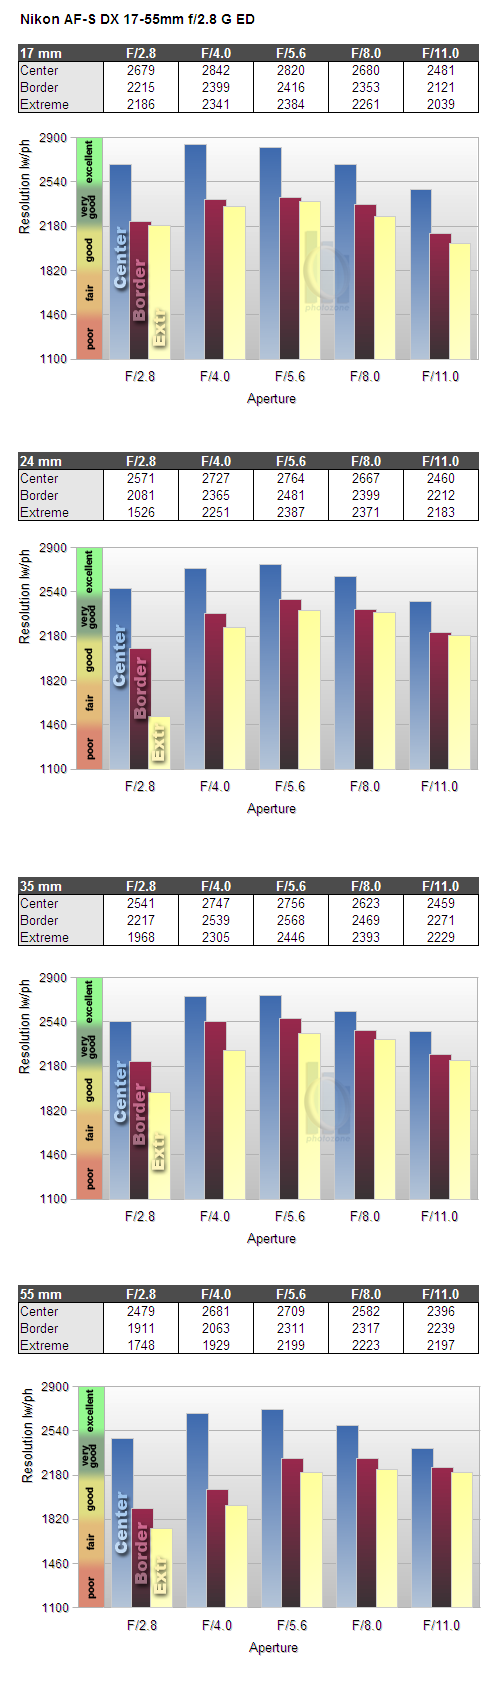
MTF (resolution)
As one might expect in this price class the AF-S 17-55mm DX is a pretty
impressive performer regarding resolution but it is still not a lens without flaws here.
The center resolution of the lens is extremely high straight from the max. aperture
regardless of the focal length.
At 17mm the borders as well as the extreme borders are pretty decent even at f/2.8
and very good at medium aperture settings. Unfortunately there's a weak spot at
24mm where the extreme borders are quite soft at f/2.8 but from f/4 and up they
catch up quite nicely. At 35mm the borders are on a pretty high level
straight from f/2.8. The outer image regions aren't quite as good anymore at 55mm - especially at max. aperture so you should down to f/5.6 if you require sharp images across the frame.
The lens exhibited a quite high degree of residual spherical aberrations
(focus shift when stopping down) at 24mm as well as strong field curvature at 17mm.
Please note that the MTF results are not directly comparable across the different systems!
Below is a simplified summary of the formal findings. The chart shows line widths per picture height (LW/PH) which can be taken as a measure for sharpness.
If you want to know more about the MTF50 figures you may check out the corresponding Imatest Explanations
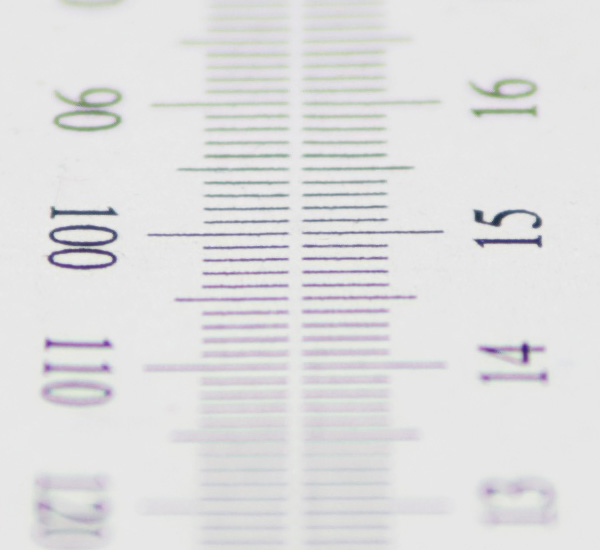
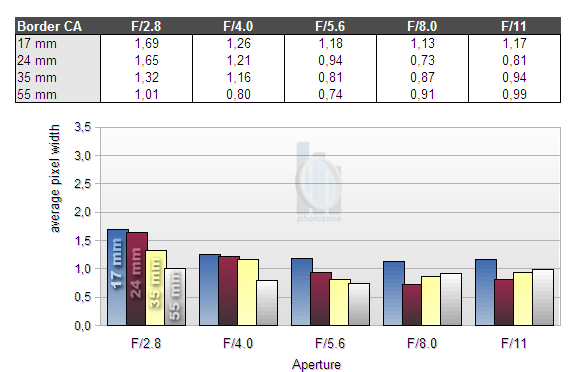
Chromatic Aberrations (CAs)
Chromatic aberrations (color shadows at harsh contrast transitions) are relatively well controlled for such a zoom lens. The issue is a little bit more pronounced at large aperture settings towards the wide-end of the zoom range (> 1.5px on the average at the image borders) where CAs may be visible in some situations.
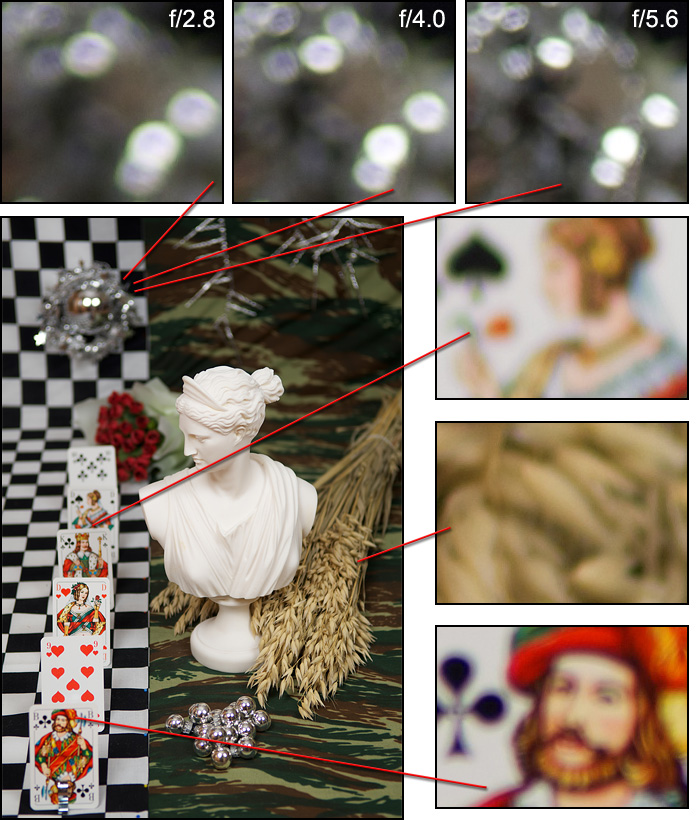
Bokeh
We had a brief look at the quality of the bokeh (out-of-focus blur) at 55mm. The blur is generally smooth in the background, a bit less so in the foreground. While there's nothing really wrong about the blur, the quality of out-of-focus highlights isn't quite as impressive. They show a strong outlining effect as well as an onion-like substructure. This is rather disappointing for such a pricey lens.
Bokeh Fringing
Bokeh fringing (non-coinciding focal planes of the various colors) is a common issue with relatively fast glass. As you can
notice below, the halos have different colors - magenta (red + blue) in front the focus point
and green beyond. Truly "apochromatic" lenses don't show this kind of fringing but these lenses are very rare. Unlike lateral lateral CAs, bokeh fringing cannot easily be fixed in post processing.
At its longest focal length of 55mm (which we used for the shots below) the lens shows a rather heavy amount of fringing wide open and it dissolves only slowly when stopping down. It's only negligible from f/8 onward.
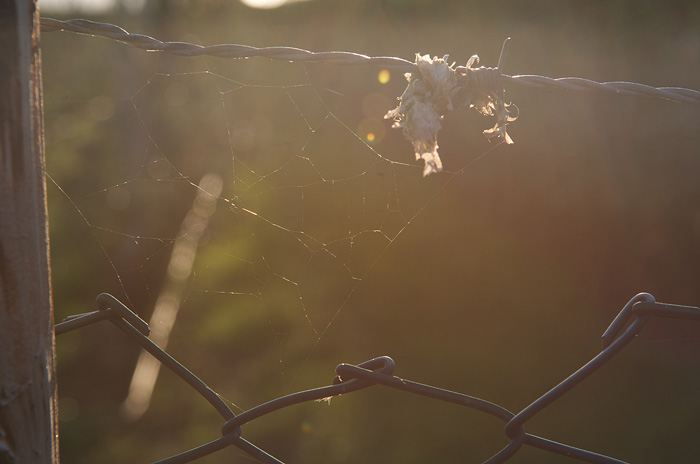
Flare/Glare
The lens does not really like backlight and visibly loses contrast across the whole image in these conditions. In addition to the glare, there are also traces of soft flare spots, but depending on the subject they may not be visible. In the sample image below, you can see green haze spots close to the lower border of the image as well as right next to that, uhm, something hanging on the fence in the upper part. Using the lens' massive hood is therefore always a good idea.
|