LIGHT METERING
Topics:
The very Basics ... or 18% gray
Metering systems are calibrated to a certain
light value in order to gurantee constant exposure settings: 18% gray is
commonly accepted because a typical scene seems reflect the same amount
of light as this gray value. As a framework for comparison all these colors
reflect light like 18% gray:
Usually this assumption works pretty good
but if you expose a scene with a majority of bright colors/grays without
compensation
in spot or center-weighted mode the camera will darken the picture to 18%
gray - the result is under-exposed. On the contrary a scene with lots of
very dark colors/grays will be lightened up to this gray value - the result
is over-exposed. The camera cannot differ between a white wall in shade
or a gray wall in sunshine because the amount of incoming ligth is identical.
Most cameras are blind in regard to colors - with just one exception (the
Nikon F5) they analyse the world based on different light values.
Negative Example (w/single segment metering
system):
real scene with -say-
10% gray on the avarage

|
the camera sees image
as if it's 18% gray
------>
|
resulting image
18% gray

|
Typical spots with risks for under-exposure:
Examples with risks for over-exposure:
-
Forest
-
Lakes
-
Dusk or dawn (lots of shadows)
Dependent on the situations you'll have to
compensate up to 2 EV to longer or shorter shutter speeds (fixed aperture)
or more or less f-stops (fixed shutter speed). Just "shifting the program"
doesn't
change
the amount of light transmitted to the film.
Note: Print films are very tolerant
to wrong exposure while slide films require an accurate metering result.
1-2 EV difference compared to the optimal setting doesn't make a difference
with prints whereas a slide image is usually quality for the trash bin
in such a case.
Common Metering Modes (SLR-cameras)
| Metering Modes |
Spot/Partial |
Center-weighted |
Multi-zone/Matrix |
| Metering characteristic |
 |
 |
 |
| Technical: |
This mode limits
the metering area to the central part of the viewfinder. Spot metering
covers about 1% to 3.5% of the image area (typically 3.5%). Partial metering
covers about 9.5%. |
Metering is averaged
over the entire scene with emphasis placed on the center area (typically
75% center - marked dark gray and black in the icon, 25% outside). |
The exposure
setting is calculated based on data from matrix/segment elements (3 to
16 or more, typically 6) taking into account such factors as the focusing
point in use, subject size, position, distance, overall lighting level,
front and back lighting and color. |
| Use this mode
... |
... when there're
big differences in brightness
(e.g. between foreground
and background) or for subjects that require precise measurement, such
as close-up photography. |
... when you
main subject covers a large portion of your image (e.g. with peripheral
shadows) |
... for general
subjects without larger shadowed or extreme bright areas. Action photography. |
| Advantages: |
Precise metering
in your control. |
Metering mode
for general scenes with relatively easy exposure compensation
control. |
Comfortable with
good reliability. |
| Problems: |
Heavy variations
in metering results. Bracketing is surely a good idea for the more extreme
situations. |
Without compensation
risk of over-exposing for scenes with major picture areas covered by sky. |
No control of
the exposure settings - you simply don't exactly know how the camera weights
the elements. |
The following illustation provides an impression
about the way modern matrix metering systems work. Basically the camera
processes the metering pattern by weighting the data with the selected
AF sensor(s) and compares this information with an an internal scene database.
Usually it'll try to avoid extreme compensation factors to reduce the risk
of a total misinterpretation of a scene. Unfortunate this policy will often
fail especially in contra light situations.
Note:
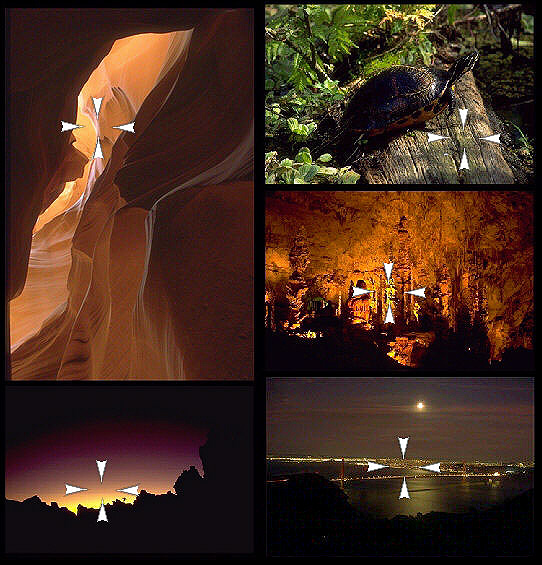
The exposure center in the pictures below is marked with  . .
This means I've centered the viewfinder to this spot, pressed the exposure lock key (or hold the shutter release
button) and shifted the scene back to the final image before shooting.
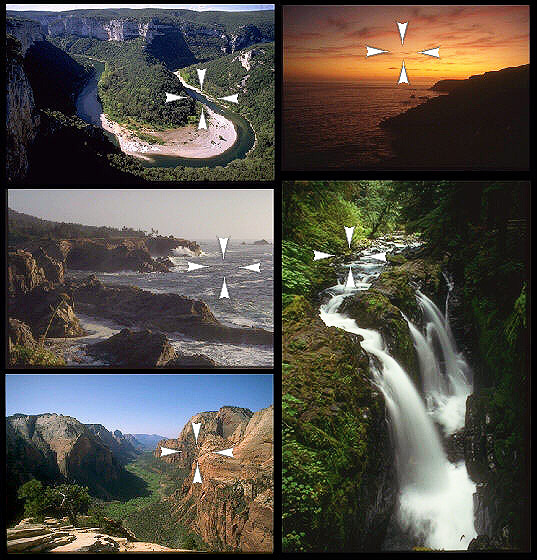
Typical scenes for Spot or Partial Metering
You should be aware of the followings points:
Typical scenes for Center-weighted Metering
Try to find a larger area which
has to be exposed right and -again- think of the limitation
of the metering system. In critical situations try to compensate manually
which can be well controlled in this mode or change to spot metering.
Typical scenes for Matrix or Multi-zone Metering
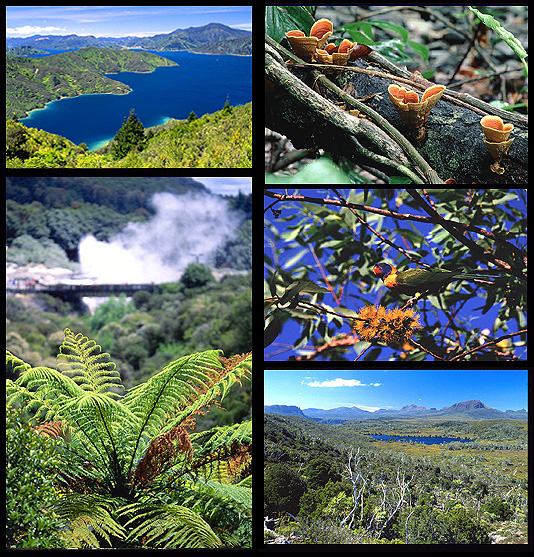
Multi-zone metering systems are very easy
to use. In primitive cases just POINT & SHOOT. Manual compensation
isn't very reliable with difficult scenes because you simply don't know
exactly how the camera calculates the settings. After some usage you may
get a certain feeling for its reactions in certain situations.
The text above may help you
to get a technically correct exposure.
However for adding contents to
your pictures you should follow this: |
David Muench:
|
"Prepare thoroughly.
Go to the sacred places.
Wait.
Look.
Feel.
Then shoot !" |
|