|
Imaging -
Imaging
|
|
Some imaging application such as Photoshop offer a so-called "high
pass" filter. The filter is capable to detect edge
details within a specified radius. Other information are suppressed. In
other words - the filter provides you with the raw data that is
important for sharpening.
Now what can be done with this information. The
raw data alone is pretty much useless but there is a workflow which
takes advantage of the high-pass filtering:
- make a copy of your image and change the color model to Lab
color (PS: image menu -> mode -> Lab color)
- apply the high pass filter (PS: filter menu -> other ->
high pass). A low filter setting (1.0-2.0) extract extremely fine
details (incl. noise if present), a higher value extracts coarse
information (excl. noise). You've to experiment a little here to find a
value that suits your specific needs.
- now omit the color information (e.g. by converting to grayscale
and back to RGB) - this reduces color noise
- copy the filtered image to the original as a new layer
- now combine the two layers by choosing "hard" or "soft" light
in the menu (the high-pass filtered image must be the active layer) of
the layer box and play around with the opacity in order to define the
degree of sharpening
Variation: you may repeat the workflow using
further high pass filters with different radius settings.
Unlike other approaches high-pass filtering does
not produce sharpening halos.
Here's how it looks ...
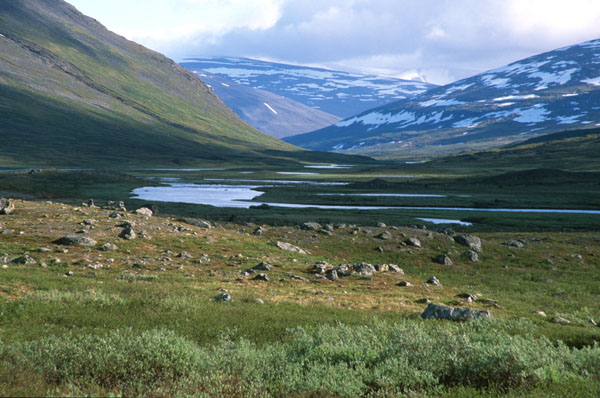
the original image (raw)
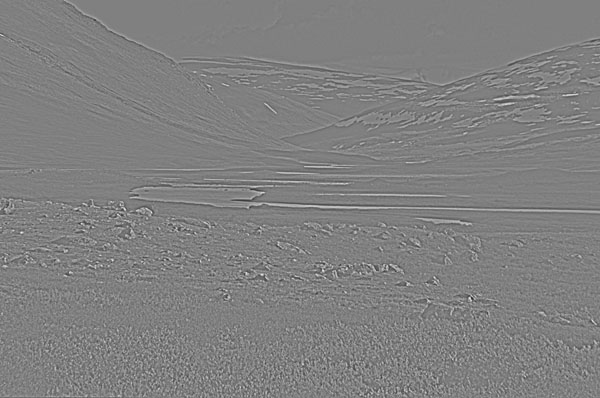
the resulting B&W high-passfilter (radius 1.5)
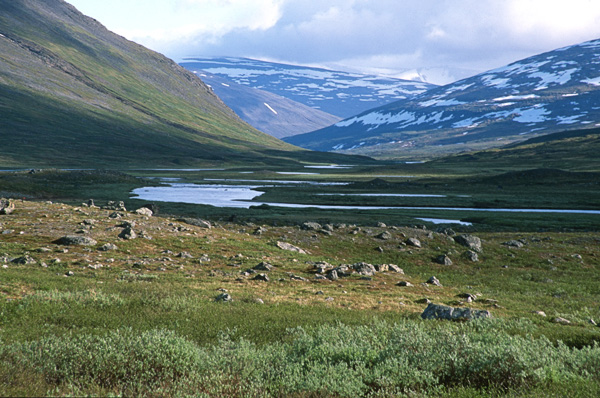
the final result (hard light, opacity 40%)
|

