|
Imaging -
Imaging
|
Introduction
Yes, you're reading correctly - this reviews is about LightZone - not Lightroom.
Most of you have probably never heard about LightZone and prior of this review but the product
is actually quite popular in the professional community - less so with average consumers.
This does probably also originate in the pricing: the batch-enabled variant costs a
whopping 249 US$.
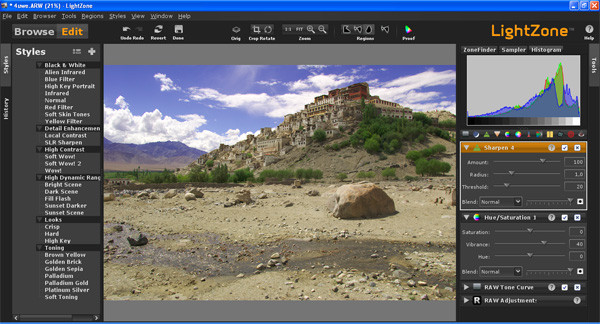
LightZone has two key differentiators over the competition.
Following the path of Photoshop one of the key concepts is the use of layers. When modifying
your image using a new filter you don't alter the base image directly but add a new layer to the
(filter-)stack. Each layer has a dedicated blending characteristic and opacity. As an example
let's assume a high ISO image with lots of shadow noise. The first filter on the stack could be
noise reduction. However, we don't want to apply the filter globally, which would be typical
for most other application, but only (blended) to the shadow portion. Thanks to the limited
effect we can also apply it rather aggressively. We may add another mostly non-destructive
noise reduction filter to the stack caring only about chroma (color) noise in highlights and mid-tones.
On top of that we could add two sharpening layers - one for fine highlight/mid-tone details
and another one for coarse edge sharpening (globally). And so on - you got the idea I guess.
The 2nd unique feature of LightZone is its different approach to the exposure handling.
It doesn't take offer the classic level or tone curve tools but uses a rather
unique Zone-Mapper - see below:
|
Original Scene 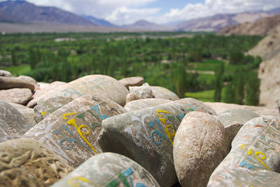
Zone-Finder 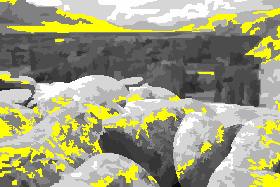
|
Zone-Mapper 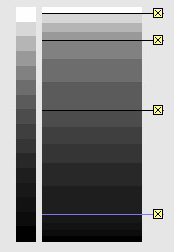
|
The Zone-Mapper divides the image into several luminosity or RGB zones. These zones are
visible in the Zone-Finder so you can get a pretty good visual feedback about
the visual distribution of the zones in your image. When moving the mouse cursor over a
specific zone in the Zone-Mapper it gets highlighted in the Zone-finder.
By design image sensors have a linear exposure characteristic resulting in rather
flat-looking images. Consequently LightZone (as well as other RAW converters or straight JPEG images)
apply an "S" curve (see the corresponding article for further explanations) to
the tone curve thus increasing contrast in the mid-tones. As you may notice above the
highlight- and shadow-zones are compressed in the Zone-Mapper - this is the local equivalent
of the S-curve. You're free to alter the compression or to introduce and modify sets of
zones. To make things even more detailed (as well as complex) you can also define one or
more regions in your image to be ignored by the Zone-Mapper (by its zoning algorithm).
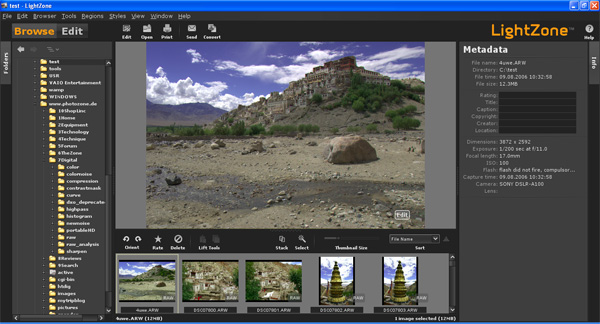
Workflow Concept
Starting with the new version 3 LightZone distinguishes between an Image Browser and Editing
mode. In the browser you can do the usual stuff - selecting and rating of images based on
a thumbnail view. Interestingly LightZone shows you multiple snapshots if you select more
than one thumbnail so if you've got very similar images it's easier to select the best
one. Selected images can also be put into a batch processing queue.
Naturally it is also possible to select and modify images on an individual basis. Unlike
in v2 the applied corrections are stored in the MetaData of the resulting JPEG file instead
of a dedicated ".lzm" file per RAW image. According to LightCraft the JPEG does still refer
to the original RAW file (in what way?) but personally I preferred the older approach
rather than mixing different formats.
Batch-processing is possible by choosing some or all thumbnail images. The processing
speed of the application is fine regarding the thumbnail generation but rather slow
in applying filters or processing complete images.
Processing Controls
| CONTROL |
IMPLEMENTED |
| Basic Exposure | via Zone-Mapper |
| Auto Exposure | Not really |
| Highlight/Shadow | Yes |
| Tone Curve | via Zone-Mapper |
| Lateral Chromatic Aberration (CA) | No |
| Purple Fringing (PF) | No |
| Vignetting | No |
| Auto Lens Flaw Correction | No |
| Distortions / Perspective | No / No |
| Rotate / Crop | Yes / Yes |
| Noise Reduction | Yes |
| Sharpening | Yes (USM) |
| White Balancing | Yes |
| Color Saturation | Yes |
| Color Vibrancy | Yes |
| Hot Pixel Detection/Masking | ? |
| Photo Organization | Yes |
| Import Formats | most RAWs, JPEG, TIFF |
| Export Formats | JPEG, TIFF |
Conversion Results
As already hinted in the introduction LightZone provides a very fine level
of control over the image manipulation steps. Unfortunately it also requires
quite a bit of effort to reach nirvana (aka the final result) - and I think
it takes longer getting there compared to competing products. However, if you
try hard you may be able to push things a tiny bit further thanks
to its layering and blending concept. To be fair the new version 3 comes
with an extensive list of so-called "styles" which are preconfigured
correction sets for specific situations (HighKey, Dark Scene, Sunset, etc.)
so this may speed up your workflow at times.
Despite its rather dull unsharp masking algorithm you can extract a very high
degree of detail from the RAW file without running into over-sharpening problems
whereas the corresponding level of noise is comparatively high (technically).
Lens flaw correction is non-existent in the application so you need to rely on
secondary applications to care about this aspect.
Conclusion
The concept of LightZone is pretty unique and it gives you lots of control over the
exposure process as well as the way you apply filters. In terms of light manipulation
LightZone is probably second to none out there. Being different and
possibly superior in some aspects doesn't hide the fact that the tool in its v3
incarnation has sill deep dark gaps - it does not offer any of lens flaw correction
controls which are offered by competing RAW converters. Many mainstream users
(and that's including myself) don't really like the idea to battle with two applications
to get the job done. A clear step forward is the new image browser mode with its
rating engine and a new META data editing option.
|
|